Gluten Free Taco Meat Sauce

Gluten Free Taco Meat Sauce

Gluten Free Taco Meat Sauce

I have always liked Tacos at home as they are a super quick meal!  You can have them done in about 15-20 minutes.  Once going gluten free, I started really looking at the ingredients in the store bought taco seasonings and it’s pretty scary all the ingredients in there!  I decided to pick out the main flavor ingredients and see if I could figure out how to replicate it on my own.  According to my family, I have it down pretty good now.  Better than the boxed stuff!

Gluten Free Taco Meat Sauce

  • 1-1.5 Ground Beef (you can use chopped chicken too, or other ground meats)
  • 1/2 cup water
  • 1/2 jar Fresh Salsa (I love using our local Frog Ranch Salsa Medium spicy!)
  • Minced Onion to taste (start with about 1-2 tbs)
  • Minced Garlic to taste (start with about 1 tbs)
  • Salt to taste
  • Pepper to taste
  • Chili Powder to taste


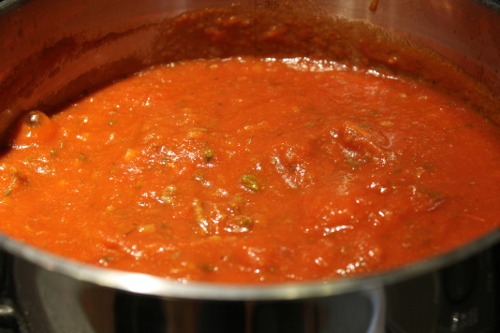
Start by browning your meat in onion, garlic, salt, pepper and chili powder.  You can always add more of this to taste once it’s cooked throughout.  Once thoroughly browned/cooked drain off any fat.  Add water and salsa to meat and let simmer for 5-10 minutes or until most of the liquid is absorbed and evaporated.  I usually add more of the Salt, Pepper and Chili Powder at this point.  While simmering, taste test and add any of the flavorings to adjust it to your preference.


Serve with Gluten Free taco shells and toppings of your choice!  We usually add fresh romaine lettuce, Mexican Cheese and more Frog Ranch Salsa!


Enjoy!

Gluten Free Curried Chicken Casserole

This dish has been a favorite of mine since my Grandmother first made it while I was in High School.  Since then I’ve tweaked it even better and more recently converted it to gluten free!  It’s great for taking to potlucks and holiday gatherings!  You can also make this the night before and then just cook it for about an hour.  It always tastes better that way and tastes better as left overs as the ingredients get a chance to meld together!


Ingredients:

Combine chicken soup, mayonnaise, curry powder, lemon juice, salt and pepper.  Mix well.  I like to taste test this at this point.  You want it to taste a bit saltier than you’d expect because it’s the main seasoning and has to season the chicken and broccoli.  In a 9×13 pan, layer 1/2 the broccoli, 1/2 the chicken, 1/2 the soup mixture.  Repeat with the remaining ingredients.  Top with buttered gluten free bread crumbs.  Bake at 350 for 30-45 minutes.  I like to put foil over it with one vent to let any extra moisture out.  Once it’s nice and bubbly, I like to remove the foil and brown at 425 for 5-10 minutes.

Chicken Casserole

Chicken Casserole before putting on the bread crumbs

Chicken Casserole ready to bake!

Chicken Casserole ready to bake!

Enjoy!

 Note: If you don’t need to be gluten free, just use 2 cans of Cream of Chicken soup and herb seasoned pepperage farms stuffing!

Gluten Free Pizza Tastes like Delivery – Part 2

Since writing my original Gluten Free Pizza Tastes Like Delivery post, I’ve found another Pizza crust that also does a great job of tasting like delivery!  Here’s the crust that is our current favorite:

You can find this in our Kroger for around $7 for 4 pizza crusts!  So it’s a pretty good value.

Gluten Free Pizza that Tastes Like Delivery Part 2:

Ingredients:

Preheat your oven to 425 if you have a pizza stone.  You may want to bake this at 350 if you do not have a pizza stone. Take the frozen pizza crust out of the freezer and prepare the pizza.  I like to put the sauce on first, then garlic and onion powder as well as the oregano.  Then I like to put the cheese, toppings and a sprinkle more cheese to hold the toppings on.  Bake for about 15 minutes depending on your oven.  If you are not making it on a pizza stone, then raise your oven to about 425 for just a few minutes (Keep an eye on it!) to slightly brown the pepperoni and cheese.  The key to making this taste more like delivery is the optional spices and the ending baking it at 425 or baking it on a pizza stone at 425.

Here’s what they look like before baking:

Pizza Uncooked

Gluten Free Sausage, Pepperoni and Mushroom Pizza

Here is the typical 4 different pizza’s I make at the same time.  I like to prepare mine on a cookie sheet so I can easily scoot them off onto my pizza stones that are preheated in the oven.

Gluten Free Pizzas

4 Different Gluten Free Pizza Varieties

Here’s the Sausage Mushroom and Pepperoni Pizza after baking.

Gluten Free Pizza Baked

Gluten Free Sausage, Pepperoni, Mushroom Pizza

Close up!

Gluten Free Pizza Close Up

I used the tube Tennessee Sausage on these pizzas.

Gluten Free Chicken Strips

With 3 kids (and a Husband…) chicken strips are always a hit!  These lightly breaded chicken strips are perfect for a quick tasty meal that’s not too heavy like the really processed chicken strips!

Ingredients:

Salt and pepper the chicken strips.  Lightly bread with the flour.  Heat oil or butter in a pan, just enough to cover the bottom, adding more if needed.   Nonstick is the easiest but I’ve done these in my stainless steal as well.  Once oil is nice and hot, place strips and turn every few minutes to keep from browning too much.  Takes about 5-7 minutes to cook depending on the thickness of your strips.  Enjoy!

Some may ask why I don’t do an egg wash.  I truly like my fried foods much lighter.  My Grandmother always just directly breaded the food she was cooking too.  I just use the natural moisture in the food to get the breading to stick.  Much simpler than doing an egg and/or milk wash!  Less calories too!

Gluten Free Baked Penne

Lasagna and baked penne is one thing I really missed after going gluten free. You can easily make this gluten free or with regular wheat penne.

Ingredients

  • 2 Jars Barilla Pasta Sauce (should say gluten free on the jar)
  • 1 Teaspoon Salt
  • 1 pound Gluten Free Penne or Ziti (corn based – I like SamMills for this recipe)
  • 1 pound low-moisture mozzarella, shredded or cubed
  • 1 cup grated Romano or Parmesan Cheese (gluten free! I use Boars Head or grate my own)
  • 1 pound ground beef(optional)

Preheat oven to 375.  Start a big pot of water and add the salt.  While the water is coming to a boil, if adding ground beef, cook and drain.  I like to add some salt and pepper when I do this to add flavor to it.  Put the Pasta Sauce in a pot and add the beef.  Warm up while your water is boiling.  Once your water is boiling, add pasta and cook for 6-7 minutes.  Your pasta should be firmer than Al Dente as you will be baking it too.

Pasta Sauce for Baked Penne

Pasta Sauce for Baked Penne

While pasta is cooking, put about 2 cups of your pasta sauce in the bottom of a 9×13 pan.  Once pasta is done, drain and quickly rinse with cool water.  Return it to your large pot.  Add remaining pasta sauce to the Penne and stir in about 3/4 pound of the mozzarella and about 3/4 cup of the Romano or Parmesan Cheese.  Stir to incorporate.

Spread pasta mix over pasta sauce in the 9×13 pan.  Spread evenly and then sprinkle with remaining mozzarella cheese and grated Romano or Parmesan Cheese.

Baked Penne Prepared

Baked Penne Prepared

Cover with aluminium foil and bake until the corners are bubbling, about 30-40 minutes.  Bake uncovered for 7-10 minutes or until the top is lightly browned.

Remove pan from the oven, recover with foil and let sit for about 10 minutes.  Enjoy!


Gluten Free Baked Penne

Gluten Free Baked Penne

Gluten free bbq ribs

So I have been working to make ribs at home. After my third attempt I think I have it down pretty well. All you need is a few hours and three ingredients.
Ingredients

  • Pork ribs
  • Emeril’s Rib rub
  • Sweet Baby Rays BBQ sauce

Preheat oven to 300. You need about 1 tbs of rib rub per pound of ribs. Put aluminum foil shiny side down on a cookie sheet and place ribs on top. Put the rub on both sides using about one tbs per pound of ribs. Seal up with the aluminum foil using more for on top of necessary. Bake meaty side down for 2.5 to 3 hours or until the rib meat is fork tender and rib meat is shrinking away from the bones.

Preheat to high grill or broiler. Drain off rendered juices. Brush on BBQ sauce on both sides and broil or grill for about 2 to 4 minutes per side or until BBQ sauce is baked on. We have found finishing them off on the grill is the best way as they get nice and smokey that way.

Gluten Free Turkey/Chicken Noodle Soup

This is a great one to prepare in the crock pot and have at a pot-luck!  It’s also great to do at home.  Feel free to change the aromatics to your liking.

Ingredients:

Put water, bullion cubes, onion, celery, salt and pepper and Turkey or Chicken in crock pot.  Cook on low until meat is done (about 4-6 hours, you can cook longer if you need to leave it all day while at work).  Once meat is cooked, shred or cut up meat.  Add rice noodles about 5-10 minutes before you are ready to serve.  You can leave them in longer but they will soak up all the juices!  That’s it!  Simple, tasty and easy for pot-lucks or at home on a busy school night!

Stove-top Option

Follow directions above but put all ingredients in a large pot.  I like to cut up the raw chicken or turkey so that it cooks faster.  This method can be done in about 20-30 minutes!

Gluten Free Fried Chicken

Today I tried to make my Grandmother’s Fried Chicken gluten free and it was a great success!  You couldn’t even tell the difference!  It came out very crispy and juicy on the inside.

Ingredients:

Mix about 1/2 gluten free flour and 1/2 gluten free bread crumbs in a flat bowl for coating the chicken.  Salt and Pepper the chicken and dip into the flour mixture.  When the chicken is all coated, heat butter in a non-stick pan on medium low.  Place chicken in once hot.  Cover and fry, turning every 4-5 minutes.  Add extra butter if necessary.  Cook about 20 minutes until done and not pink in the middle.  Drain on paper towels.  That’s it!  The key to crispy chicken is to keep the heat hot enough that the butter doesn’t get absorbed too much, but not so hot that the butter burns.

Gluten Free Pizza – Tastes like Delivery!

One thing you might miss when going gluten free is Delivery Pizza!  This is actually pretty simple to do at home if you just make one simple tweak to how you normally make pizza at home!

First I start with Udi’s Gluten Free Crust.  I can find this at our local Kroger’s for a pretty reasonable price (almost the same as gluten crust!)


Next I use a very simple, jarred pizza sauce.  By simple I mean something with very small number and natural ingredients.   I like to use Mid’s pizza sauce.  It’s usually just a few dollars in our Krogers.


Next you can put on any toppings you like.

Here’s how I made the pizza below.

Delivery tasting Gluten Free Pizza

Delivery tasting Gluten Free Pizza

Ingredients:

  • 1 Udi’s Gluten Free Pizza Crust
  • 1-3 tbs Mid’s Pizza Sauce
  • Shredded Cheese (sometimes I use Mexican style…no seasonings.., sometimes just mozzarella)
  • Hormel Pepperoni
  • Fresh Green Pepper
  • Canned Mushrooms (I prefer canned to fresh for some reason!)
  • Cooked Bacon (I just use leftover I’ve frozen or refrigerated)
  • Garlic Powder to taste (optional)
  • Onion Powder to taste (optional)

Preheat oven to 375.  Layer pizza sauce, garlic & onion powder, cheese, then toppings onto gluten free pizza crust.  Bake for 7-10 minutes.  Once cheese looks nice and melted and toppings hot, switch your oven to broil for 1-2 minutes.  It’s important to keep an eye on the pizza at this point!  Watch until the cheese really starts to bubble and the edges of the pizza turn a golden brown.

Optionally: When you get ready to switch to broil, add a sprinkle of fresh cheese on top to help hold all the toppings together.

Ultimate Taste Test!  So for our oldest’s birthday party, I made these Gluten Free Pizzas for all the kids.  They were simpler with just cheese or pepperoni since that’s what they preferred.  I got lots of compliments from the 10-11 year olds on the pizza!

Gluten Free Grilled Cheese

Such a simple thing but Grilled Cheese is something you might crave when going gluten free!  Luckily, I actually think that Gluten Free Grilled Cheese is better than regular grilled cheese!

Our favorite bread in the house is Udi’s Gluten Free Bread. The great thing about their bread is that it has all these nice holes in it!  This is perfect for grilled cheese!  All that cheese seeps into the holes and makes it so gooey!  Most highly processed breads that are full of gluten are so processed and manufactured that they take out these nice small-medium holes and have tiny ones that the cheese can’t get into.

Ingredients:

  • 2 pats of butter
  • 2 slices of your favorite cheese (gluten free!)
  • 2 slices of your favorite gluten free bread

Heat 1 pat of butter on low-medium, place bread, cheese, then bread and then the last pat of butter on top.  Cook for a few minutes until the bottom piece of bread is nice and golden brown.  Flip sandwich over taking care that the butter on top ends up on bottom.  Cook for a few more minutes until gold brown and cheese is melted.  Enjoy!