Gluten Free Taco Meat Sauce

Gluten Free Taco Meat Sauce

Gluten Free Taco Meat Sauce

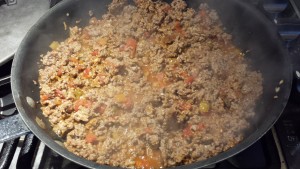
I have always liked Tacos at home as they are a super quick meal!  You can have them done in about 15-20 minutes.  Once going gluten free, I started really looking at the ingredients in the store bought taco seasonings and it’s pretty scary all the ingredients in there!  I decided to pick out the main flavor ingredients and see if I could figure out how to replicate it on my own.  According to my family, I have it down pretty good now.  Better than the boxed stuff!

Gluten Free Taco Meat Sauce

  • 1-1.5 Ground Beef (you can use chopped chicken too, or other ground meats)
  • 1/2 cup water
  • 1/2 jar Fresh Salsa (I love using our local Frog Ranch Salsa Medium spicy!)
  • Minced Onion to taste (start with about 1-2 tbs)
  • Minced Garlic to taste (start with about 1 tbs)
  • Salt to taste
  • Pepper to taste
  • Chili Powder to taste


Start by browning your meat in onion, garlic, salt, pepper and chili powder.  You can always add more of this to taste once it’s cooked throughout.  Once thoroughly browned/cooked drain off any fat.  Add water and salsa to meat and let simmer for 5-10 minutes or until most of the liquid is absorbed and evaporated.  I usually add more of the Salt, Pepper and Chili Powder at this point.  While simmering, taste test and add any of the flavorings to adjust it to your preference.


Serve with Gluten Free taco shells and toppings of your choice!  We usually add fresh romaine lettuce, Mexican Cheese and more Frog Ranch Salsa!


Enjoy!
Strawberry Desert Soup

Strawberry Soup

Strawberry Soup


This is a great quick summer time treat!  Natural and gluten free!

Ingredients

  • 2 cups fresh strawberries hulled
  • 1 Cup Orange Juice
  • 1 Cup Yogurt
  • 1/2 tsp Gluten Free Vanilla Extract

Use a stick blender or your regular blender and blend all ingredients together!  You can add more strawberries to taste if needed.  My first batch was too ‘orangy’ from the Orange Juice.  We also put some of the soup in the fridge and it thickened up some and was a great snack for after a workout!


Gluten Free Curried Chicken Casserole

This dish has been a favorite of mine since my Grandmother first made it while I was in High School.  Since then I’ve tweaked it even better and more recently converted it to gluten free!  It’s great for taking to potlucks and holiday gatherings!  You can also make this the night before and then just cook it for about an hour.  It always tastes better that way and tastes better as left overs as the ingredients get a chance to meld together!


Ingredients:

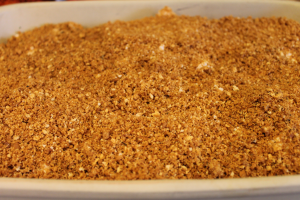
Combine chicken soup, mayonnaise, curry powder, lemon juice, salt and pepper.  Mix well.  I like to taste test this at this point.  You want it to taste a bit saltier than you’d expect because it’s the main seasoning and has to season the chicken and broccoli.  In a 9×13 pan, layer 1/2 the broccoli, 1/2 the chicken, 1/2 the soup mixture.  Repeat with the remaining ingredients.  Top with buttered gluten free bread crumbs.  Bake at 350 for 30-45 minutes.  I like to put foil over it with one vent to let any extra moisture out.  Once it’s nice and bubbly, I like to remove the foil and brown at 425 for 5-10 minutes.

Chicken Casserole

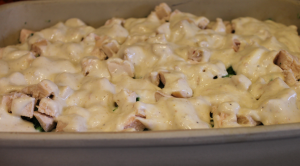
Chicken Casserole before putting on the bread crumbs

Chicken Casserole ready to bake!

Chicken Casserole ready to bake!

Enjoy!

 Note: If you don’t need to be gluten free, just use 2 cans of Cream of Chicken soup and herb seasoned pepperage farms stuffing!

Gluten Free Pizza Tastes like Delivery – Part 2

Since writing my original Gluten Free Pizza Tastes Like Delivery post, I’ve found another Pizza crust that also does a great job of tasting like delivery!  Here’s the crust that is our current favorite:

You can find this in our Kroger for around $7 for 4 pizza crusts!  So it’s a pretty good value.

Gluten Free Pizza that Tastes Like Delivery Part 2:

Ingredients:

Preheat your oven to 425 if you have a pizza stone.  You may want to bake this at 350 if you do not have a pizza stone. Take the frozen pizza crust out of the freezer and prepare the pizza.  I like to put the sauce on first, then garlic and onion powder as well as the oregano.  Then I like to put the cheese, toppings and a sprinkle more cheese to hold the toppings on.  Bake for about 15 minutes depending on your oven.  If you are not making it on a pizza stone, then raise your oven to about 425 for just a few minutes (Keep an eye on it!) to slightly brown the pepperoni and cheese.  The key to making this taste more like delivery is the optional spices and the ending baking it at 425 or baking it on a pizza stone at 425.

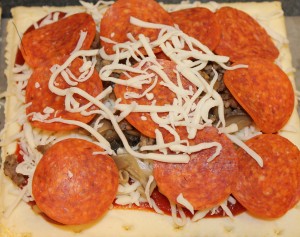
Here’s what they look like before baking:

Pizza Uncooked

Gluten Free Sausage, Pepperoni and Mushroom Pizza

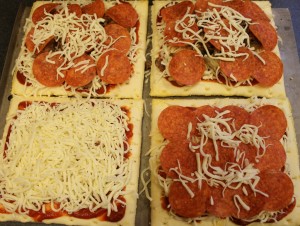
Here is the typical 4 different pizza’s I make at the same time.  I like to prepare mine on a cookie sheet so I can easily scoot them off onto my pizza stones that are preheated in the oven.

Gluten Free Pizzas

4 Different Gluten Free Pizza Varieties

Here’s the Sausage Mushroom and Pepperoni Pizza after baking.

Gluten Free Pizza Baked

Gluten Free Sausage, Pepperoni, Mushroom Pizza

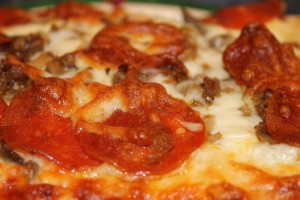
Close up!

Gluten Free Pizza Close Up

I used the tube Tennessee Sausage on these pizzas.

Peanutbutter Cup Sandwich

Now this one is super simple and a staple for school lunches around here. What’s better than chocolate and peanut butter? For me, not much is. You just simply need 3 ingredients for this quick sandwich!

Ingredients:

  • Peanut Butter

Be careful what brand of chocolate chips you use! Many are used on the same lines or with other gluten containing ingredients. Enjoy Life brand is the only one I’ve had that is delicious AND certified gluten free!

Just spread peanut butter on bread, sprinkle the mini chocolate chips and enjoy!

Gluten Free Chicken Strips

With 3 kids (and a Husband…) chicken strips are always a hit!  These lightly breaded chicken strips are perfect for a quick tasty meal that’s not too heavy like the really processed chicken strips!

Ingredients:

Salt and pepper the chicken strips.  Lightly bread with the flour.  Heat oil or butter in a pan, just enough to cover the bottom, adding more if needed.   Nonstick is the easiest but I’ve done these in my stainless steal as well.  Once oil is nice and hot, place strips and turn every few minutes to keep from browning too much.  Takes about 5-7 minutes to cook depending on the thickness of your strips.  Enjoy!

Some may ask why I don’t do an egg wash.  I truly like my fried foods much lighter.  My Grandmother always just directly breaded the food she was cooking too.  I just use the natural moisture in the food to get the breading to stick.  Much simpler than doing an egg and/or milk wash!  Less calories too!

Oven Fries – Naturally Gluten Free!

These oven fries are Delicious and naturally gluten free!  Super simple to make too!

Ingredients:

  • 6-8 Medium Potatoes
  • 2 tbsp oil
  • 2 tsp salt
  • 3/4 tsp pepper

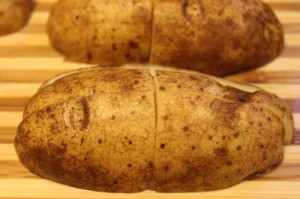
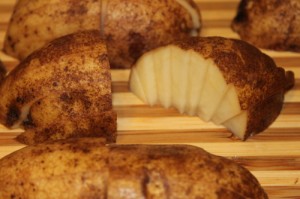
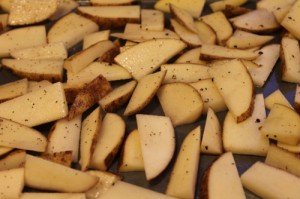
Cut potatoes into wedges. I like to do this by cutting mine in half, then slicing the wedges, then cutting the wedges in half so they cook faster. Toss with oil, salt and pepper.

oven_fries
oven_fries2
oven_fries3

Bake on a greased cookie sheet at 400F for 45 min. Stir potatoes every 15 minutes while baking. Serves 6.

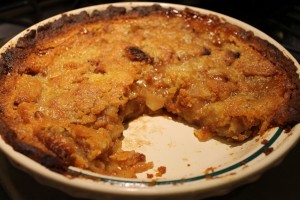
Gluten Free Apple Pie in a ‘Bag’

So I just made apple pie for the first time and WOW was this recipe good!  I found one almost just like it in my old church cookbook as well so I decided to try it.

Ingredients:

Pie Crust:

Pie Filling

Topping

Directions:

  1. Roll out pie crust out and place into a pie dish.  Cut off any excess pie crust.
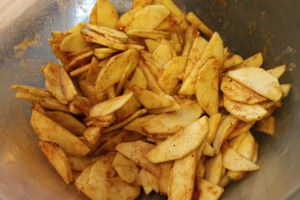
  2. Make the pie filling by stirring all ingredients except for the Graham Cracker Crumbs and set aside.  (I liked to put the lemon juice in a bowl while I was slicing the apples up and stirring them in as I sliced them to keep them from browning, then I added the other ingredients.)

    Apple Pie Filling

    Apple Pie Filling

  3. Make the topping by mixing all ingredients until you have a sticky soft dough.
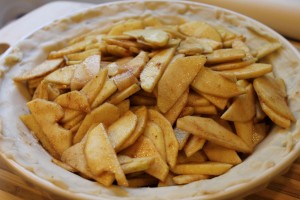
  4. Assemble the pie by first sprinkling evenly the graham cracker crumbs on top of the pie crust, follow by the filling piled in a mound shape.
    Apple Pie with Filling Mound up

    Apple Pie with Filling Mound up

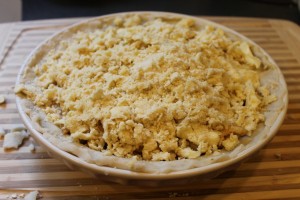
    Pinch off pieces of the topping mixture and place over the pie filling, trying to completely cover the filling.

    Apple Pie before baking

    Apple Pie before baking

  5. Preheat oven to 425 F.
  6. Tear off enough parchment paper to completely wrap the pie in.
    1. If your parchment paper is wide enough (about 15 inches wide) you only need one piece.  Wrap piece with the ends meeting under the pie.  Fold both open ends and staple or paperclip them shut so that you make a pocket for the pie to cook in.
    2. If your parchment paper isn’t wide enough, take two 30 inch long pieces and place them in a cross shape on your work surface.  Place pie on top.  Fold pieces up and staple or paper clip them to make a pocket.
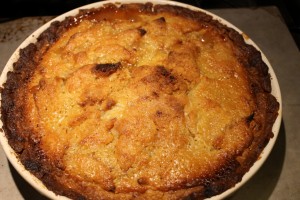
  7. Bake in preheated oven for 1 hour.  Do not break open or peek inside while baking.  Once the hour is up, remove from oven and cut open the paper to let cool.  Serve still warm.

YUM!

Baked Apple Pie

Baked Apple Pie

Note:  My pie crust got too brown.  Next time I’m going to protect it with an aluminum foil ring over the crust.

apple_pie_baked_sliced

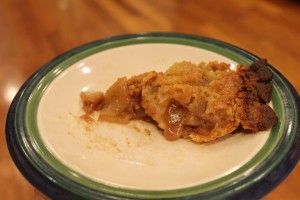
Slice of Apple Pie

Slice of Apple Pie


Gluten Free Pie Crust

This recipe makes a double pie crust and isn’t any different from a gluten pie crust other than the GF flour!  If you need just a bottom shell, just divide the ingredients in half.

Our preferred flour is Bob’s Red Mill All-Purpose Gluten-Free Baking Flour, 22-Ounce Packages (Pack of 4).

Note one key is to have very cold butter.  Just cut the butter up in slices and freeze for 15 minutes while you get the other ingredients ready!

  • 2 1/2 cups all-purpose gluten free flour, plus extra for rolling
  • 1 cup (2 sticks or 8 ounces) unsalted butter, very-cold, cut into 1/2 inch cubes
  • 1 teaspoon salt
  • 1 teaspoon sugar
  • 6 to 8 Tbsp ice water

Combine the dry ingredients, flour, salt and sugar in a food processor and pulse to mix.  Add butter and pulse minimally to mix.  About 6 to 8 times.  Add ice water 1 tbsp at a time, pulsing to mix.  Test after a few tablespoons by pinching in your palm or between your hands.  If the mix sticks together, then you have enough water.  Too much water will make a tough crust.

Once you have it, press it on some wax paper and get it to stick together and divide it in half.  Wrap in plastic wrap and refrigerate for a minimum of 1 hour or up to a day.

Remove a disk from the refrigerator and let it sit at room temperature for about 5-10 minutes so that it’s easier to work with.  Roll out on a lightly floured surface with extra Gluten Free Flour.  Be sure to not use grandma’s old rolling pin!  Old wooden rolling pins can hold flour!  Make sure you get a new one and use it only for gluten free makings!  Roll out until the crust is about 1.5 inches larger in diameter than your pie pan/plate.  Flip the plate upside down to check.  Carefully place the crust into the pan, trimming the edges if necessary to be only about 1/2 inch larger than needed.

Fill pie with filling!  Repeat for the top layer before baking if you are having a top crust.  Bake according to your recipe!  I like adding some extra sugar to the top just before baking.

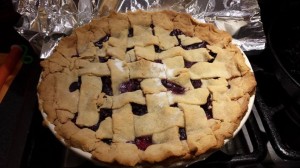
Here’s a BlackBerry Pie I made with this recipe!  First time I’ve ever done a lattice topping so excuse the cracks!

Gluten Free BlackBerry Pie

Gluten Free BlackBerry Pie

Gluten Free Chocolate Peanut Butter Rice Krispie Treats

These things are pretty awesome and are a great spin on a classic.

  • 1 c. sugar
  • 1 c. light Karo syrup
  • 1 c. peanut butter
  • 6 c. Rice Krispies (GF) (We like Nature’s Path Organic)
  • 1  pkg. chocolate chips
  • 2 tablespoons Crisco ( butter might work also)

Cook sugar and syrup in 3 quart saucepan over medium heat until mixture boils. Remove from heat; stir in peanut butter. Mix in Rice Krispies. Press into 9″x13″ pan. Let harden. Melt in double boiler chocolate chips and crisco. Stir to blend. Spread over Krispie mixture. Chill 5 minutes until top is firm. Cut in squares and Enjoy!